Boot performance
A number of improvements to the Ubuntu start-up process bring significantly improved boot performance to Ubuntu 9.04.
Linux kernel 2.6.28
Ubuntu 9.04 RC includes the 2.6.28-11.37 kernel based on 2.6.28.8.
Ext4 filesystem support
STEP BY STEP GUIDE FOR UBUNTU 9.04 LAMP SERVER INSTALLATION WITH JOOMLA 1.5.x (for beginner)
STEPS:
Insert your ubuntu 9.04 installation cd/dvd into your dvd/cd drive. Note: Make sure you set the boot sequence to boot-up dvd/cd in your bios setup.
1. select your language and hit enter.
(DOUBLE CLICK IMAGE TO ENLARGE)
 2. hit enter.
 3. Select your language and hit enter.
 4. hit enter
 5. select no and hit enter.
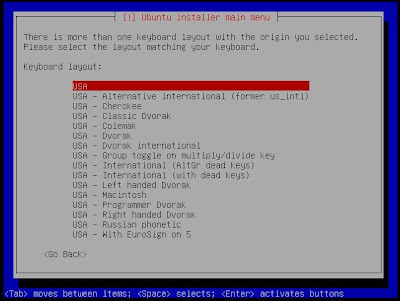
 6. select your keyboard and hit enter.
 7. select your keyboard layout and hit enter.
 8. select hostname you want and continue.
 9. select your time zone and hit enter.
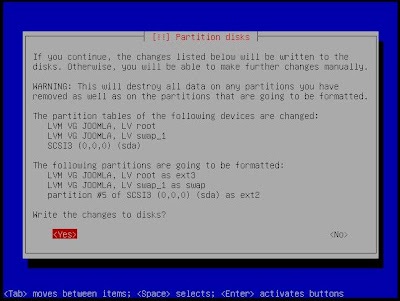
 10. select guided->use entire disk and set-up LVM, and hit enter. (Note: remember this will erase entire your disk and data once the new settin is written to the disk.)
 11. select yes and hit enter.
 12. set the amount of the disk space to be used and hit enter to continue.
 13. select yes and hit enter.
 14. enter your full name and hit enter to continue.
 15. enter your username and hit enter to continue.
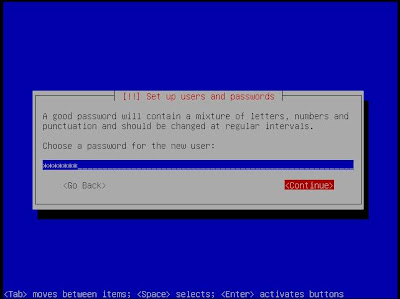
 16. set your password and hit enter to continue.
 17. encrypt your home directory? select no and hit enter to continue.
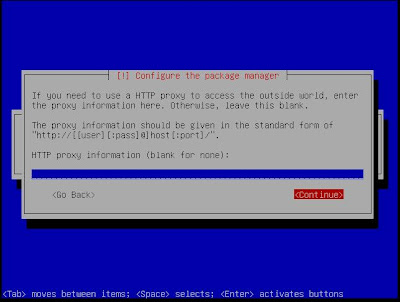
 18. http proxy information leave it blank and hit enter to continue.
 19. select no automatic update and hit enter.
 20. select LAMP server and Openssh server and hit enter to continue.
 21. set your mysql root password and hit enter to continue. Please set back and relax while the packages are being installed. (Note: after the installation make sure to remove the ubuntu 9.04 cd before you restart.
Now your LAMP server is up and running you need to set-up static IP address before we install joomla 1.5.x to do this run this code bellow.
SETTING UP STATIC IP ADDRES OF LAMP SERVER:
Note: Use your editor you familiar
sudo apt-get update
sudo
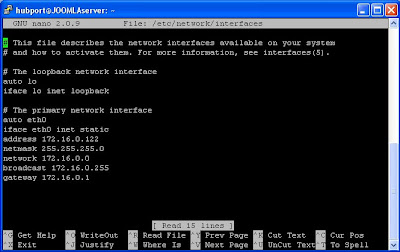
[This is the default setting of primary network interface]
auto eth0
iface eth0 inet dhcp
[key-in this new settings, exit and save.] [note: you can change the ip address you want]
auto eth0
iface eth0 inet static
address 172.16.0.122
netmask 255.255.255.0
network 172.16.0.0
broadcast 172.16.0.255
gateway 172.16.0.1
You need to restart the interface services run this code bellow.
sudo /etc/init.d/networking restart
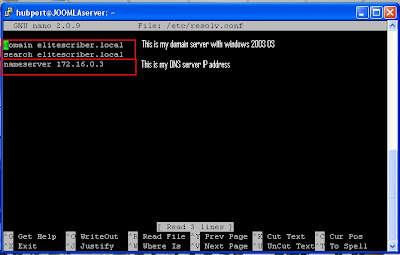
All set!!! but before we need to do some test by pinging the google.com if the system can resolve the name. if it does you ready to install joomla 1.5.x, if not you, need to edit resolv.conf by doing this run code bellow.
sudo
Joomla is an award-winning content management system (CMS), which enables you to build Web sites and powerful online applications. Many aspects, including its ease-of-use and extensibility, have made Joomla the most popular Web site software available. Best of all, Joomla is an open source solution that is freely available to everyone.
VSFTPS Installation using terminal console:
sudo apt-get install vsftpd
Edit vsftpd.conf
sudo
Replace the value of this -->‘anonymous_enable = YES’ to ‘anonymous_enable = NO’
Remove pound sign this -->‘#local_enable = YES’
Remove pound sign this -->‘#write_enable = YES’
Creating user to administer joomla server:
sudo useradd joomlauser
sudo passwd joomlapassword
Create joomla directory:
sudo mkdir /var/www/joomla
sudo ln -s /var/www/joomla /home/joomlaUser
Edit php.ini
sudo
Replace the value of this--> ‘display_errors = On’ and change it to ‘display_errors = Off’
Remove the comment, and change the directory path ‘;session.save_path = /var/lib/php5′ to ’session.save_path = /var/lib/php5′ (This is a comment symbol, semi colon--> ‘ ; ’ )
Download Joomla Software
Please check www.joomla.com for the latest version.
Download joomla software to www folder.
cd /var/www
sudo wget http://joomlacode.org/gf/download/frsrelease/8232/30034/Joomla_1.5.6-Stable-Full_Package.zip
sudo unzip Joomla_1.5.6-Stable-Full_Package.zip -d /var/www/joomla
Incase unzip package is not install yet run this code bellow.
sudo apt-get install unzip
Edit permission of www folder.
sudo chmod 777 -R /var/www/joomla
Restart all these services.
sudo /etc/init.d/apache2 restart
sudo /etc/init.d/vsftpd restart
http://localhost/joomla
or
http://192.168.1.122/joomla
Joomla Installation
Cleaning up all the installation folder.
sudo rm -r /var/www/joomla/installation
Continue by clicking this button--> ‘Admin‘
